Deploying a Fullstack Project on CuembyPlatform
Introduction
This guide explains how to deploy a fullstack project on CuembyPlatform. The project consists of a frontend and two backend services (API Gateway and Microservice), using GitHub for code versioning and integration from CP, but you can use the gitProvider that CuembyPlatform has.
1. GitHub Repositories
If you have a project with more microservices, you can integrate them as well. (This also depends on your current plan in CuembyPlatform, as plans define the number of available runtimes.)
in this case we will work with 3 repositories:
- Frontend repository
- API Gateway service repository
- Microservice repository
2. Integration between CuembyPlatform (CP) and GitHub
- Log in to CuembyPlatform.
- Go to Integrations and select Git.
- Create an integration with GitHub, granting the necessary permissions.
For detailed instructions, refer to the guide: How to connect your Git integrations.
3. Creating Templates
Three templates will be created for the services: frontend, API Gateway, and microservice.
For detailed instructions, refer to the guide: How to create a template.
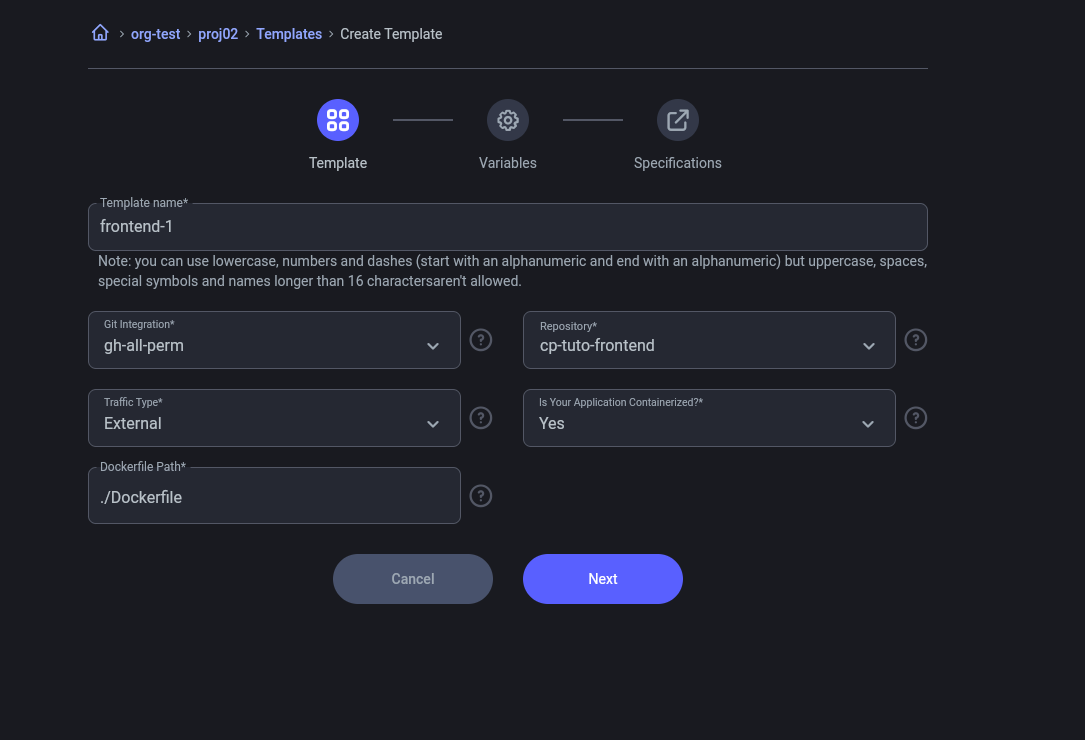
3.1 Template Configuration
- Use the previously created integration.
- Specify the required environment variables.
- Set the template details: instanceType, replicas, and port.
Frontend and Microservice
- Set the option
is_containerize=true. - Frontend: External traffic
- Microservice: Internal traffic
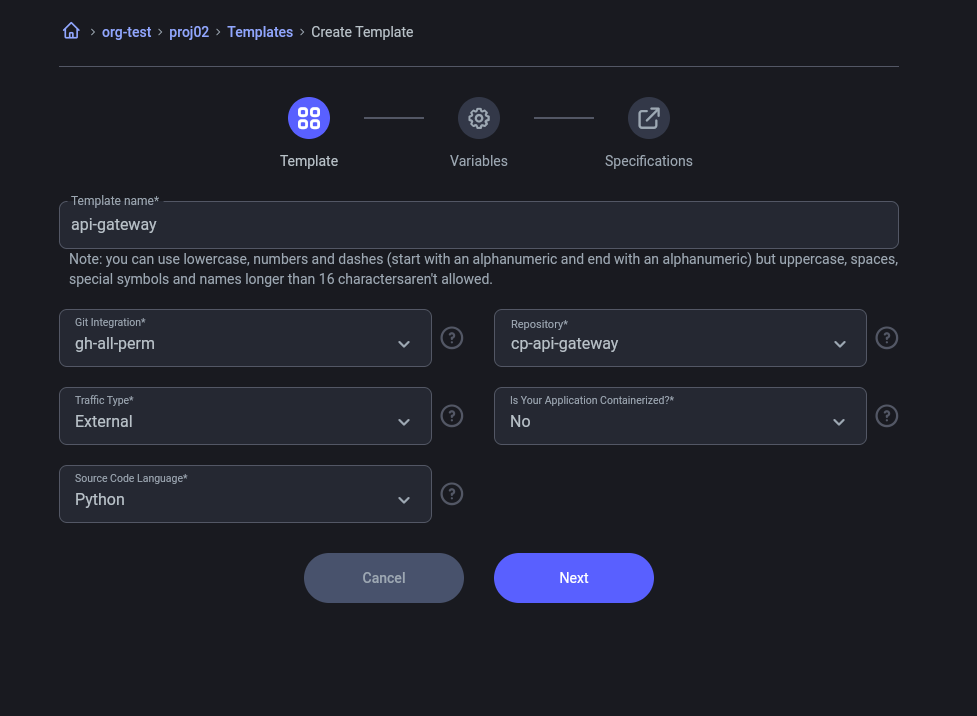
API Gateway
- Set the option
is_containerize=false. - Configure External traffic.
This is done so that users can see that you can create containerized and non-containerized runtimes.
Traffic "External" and "is you application containerized"
Option "is you application containerized" in NO
4. Creating the Environment
- Go to the Environments section in CP.
- Create a new environment for the project deployment.
For detailed instructions, refer to the guide: How to create an Environment.
5. Creating Runtimes
We will go from creating service by service, from the one that does not depend on others, to the one that depends on other services.
- First we will create the microservice service to obtain the URL
Already created our microservice with internal traffic We obtain the URL that gives us CP and thus have communication with it.
Service by service will be created, from the one that does not depend on others, to the one that depends on other services.
- The “cp-microservice” service will be created.
- Then the “cp-api-gateway” service.
- Finally it will be the Frontend
5.1. Create microservice (if you require environment variables, they will be added in variables)
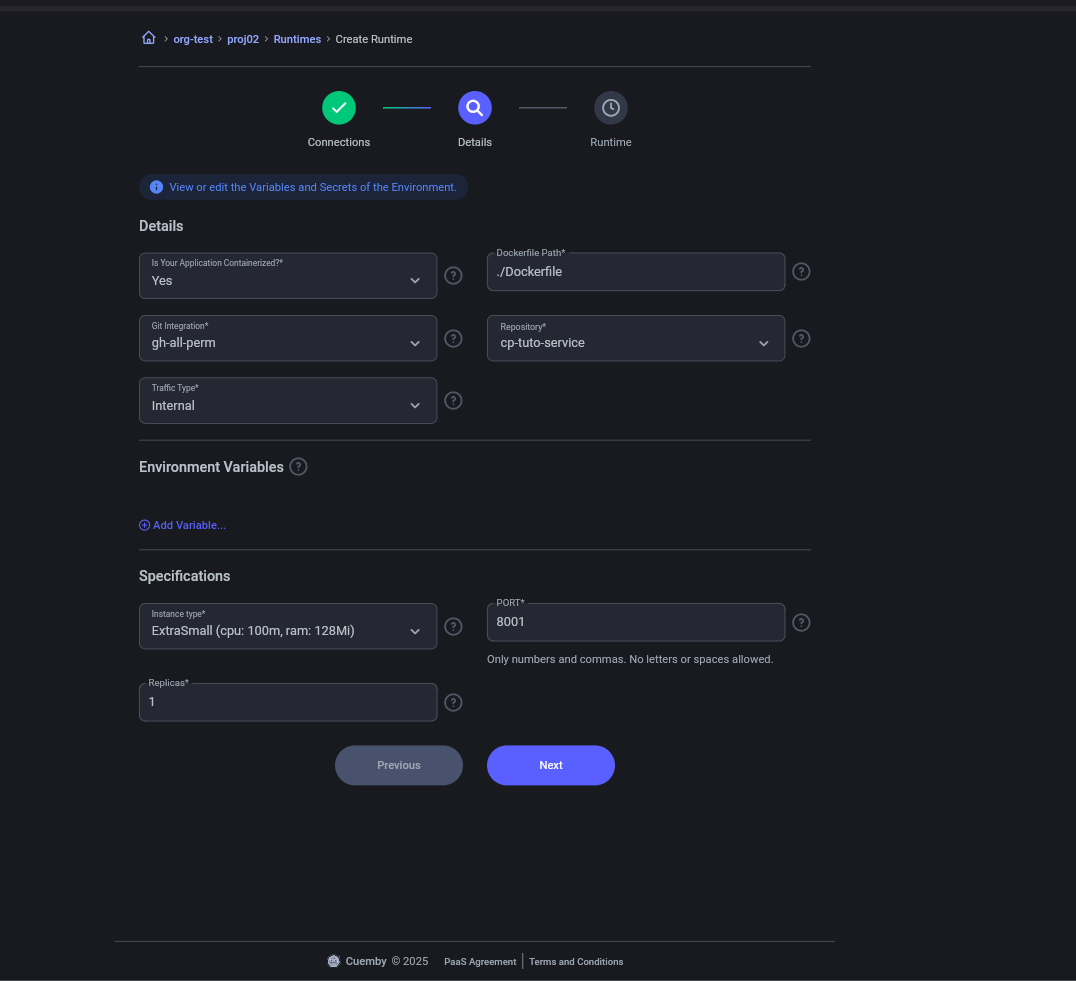
Details
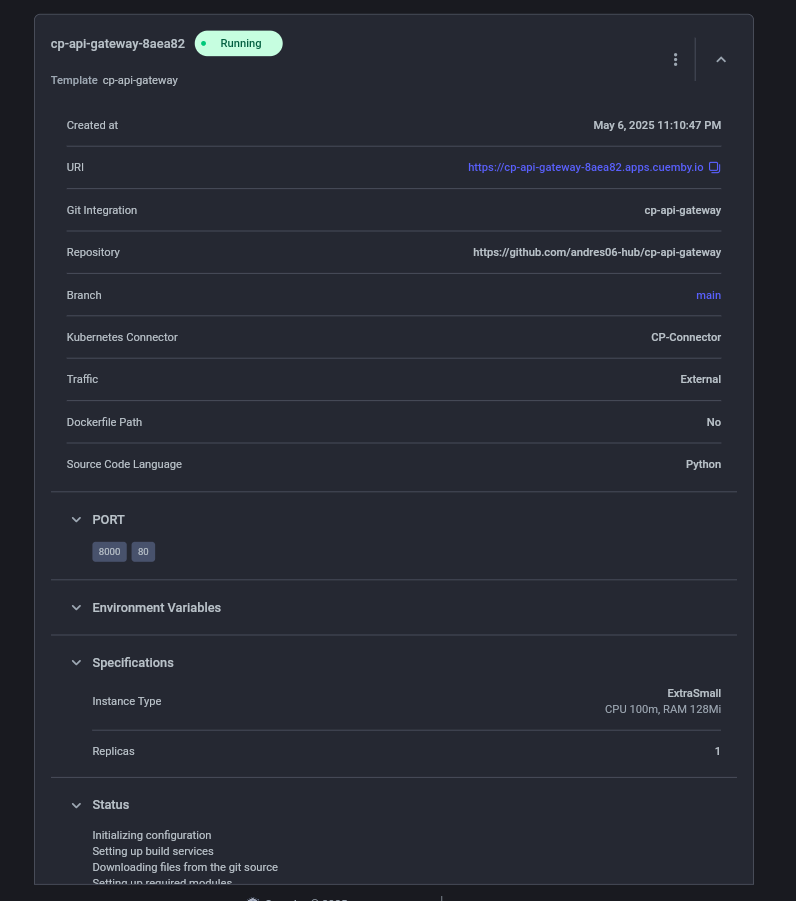
5.2. Create api-gateway (We pass by environment variable the URL generated by “cp-microservice” for the communication of “api-gateway” with “cp-microservice”.)
The variable to be passed are:
KEY = VALUE
Ejemplo:
SERVICE2_URL = http://cp-micro-service-92b63d.proj02-v5k4ftc7f-dev:8001
the port will be the one exposed by cp-microservice
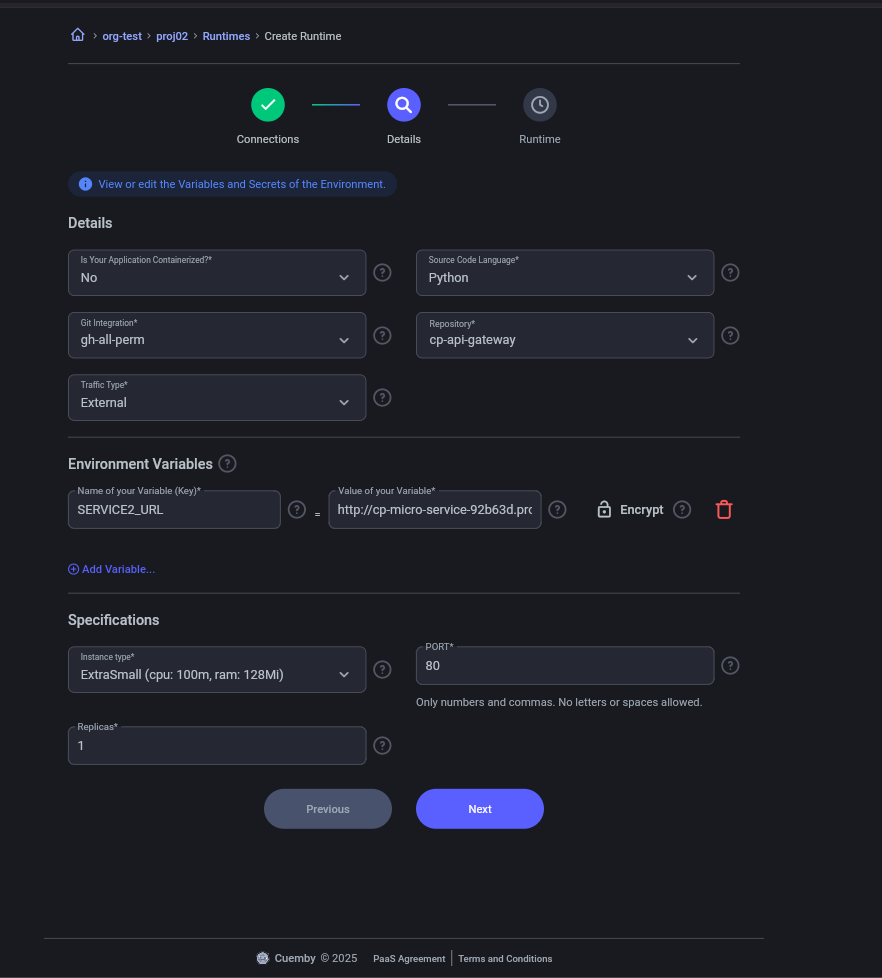
Details
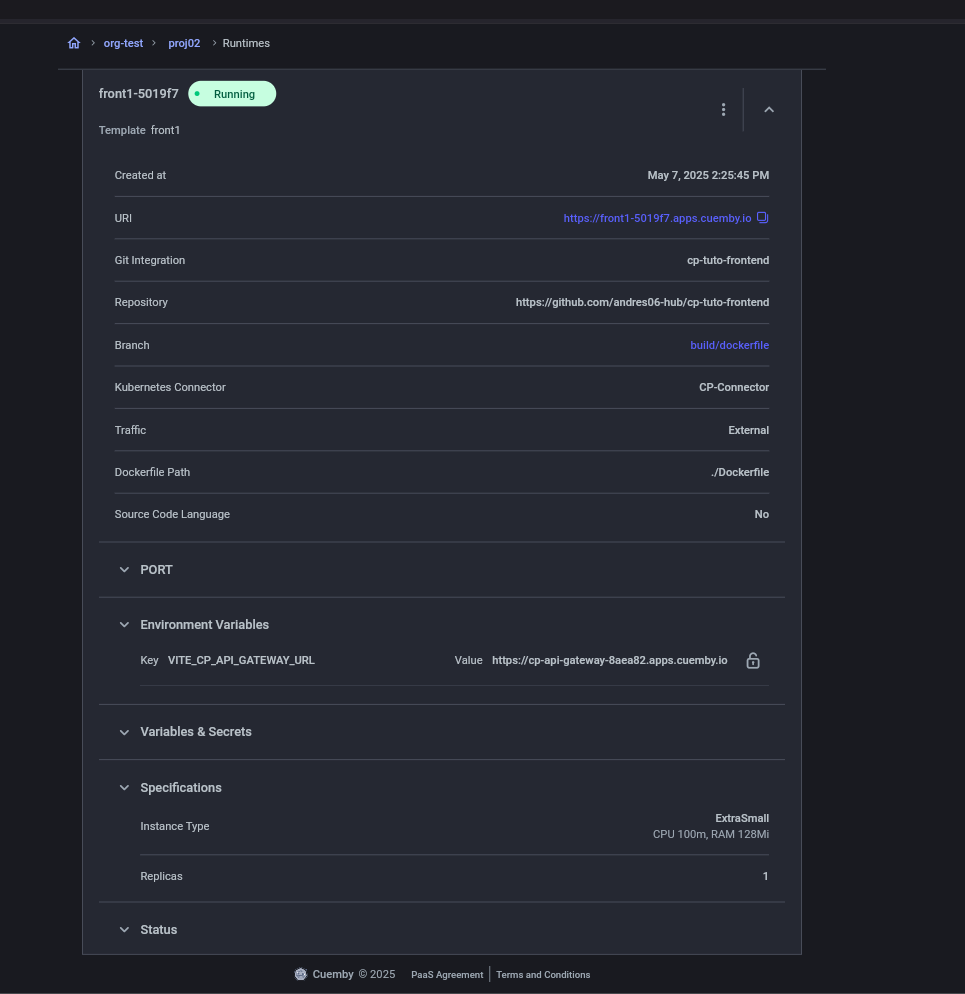
5.3. Create Frontend (Environment variable for api-gateway added)
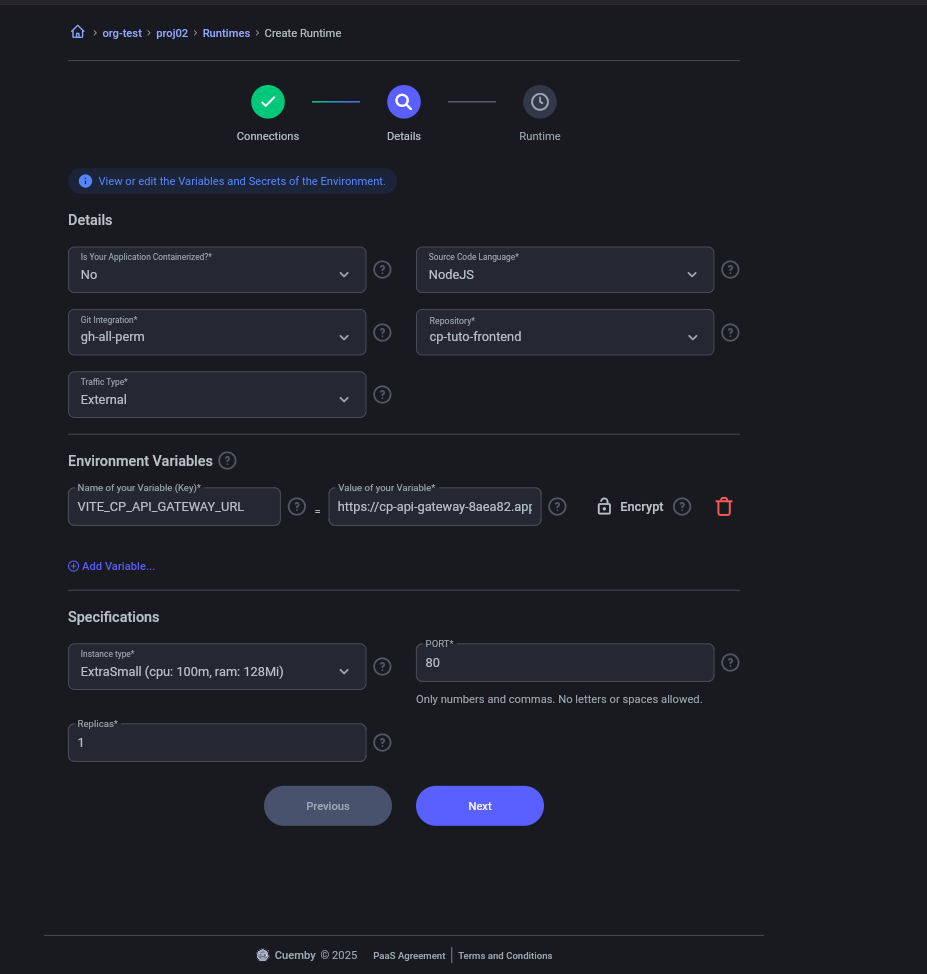
Details
Additional Configurations
- The API Gateway must have an external URL (publicly exposed).
- The microservice must have an internal URL and pass it as an environment variable to the API Gateway.
- The frontend must receive the API Gateway URL as an environment variable for communication.
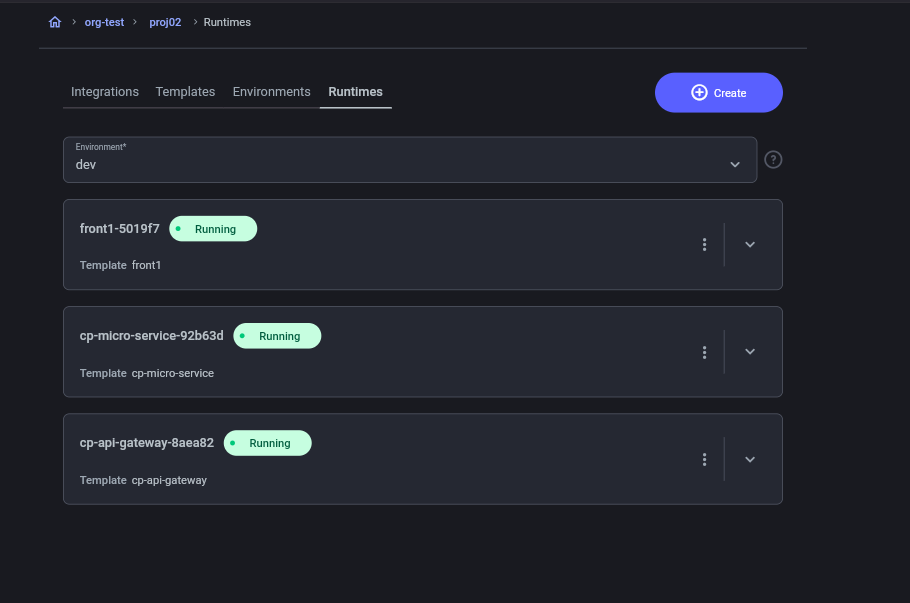
6. Monitoring the Deployment
- Check that the runtimes change their status to running.
- Verify the successful deployment in the CP interface.
7. Project Testing
- Access the URL provided by the frontend.
- Perform tests to verify the communication between the frontend and the API Gateway.
-
we would already have our frontend deployed and ready to use it.

-
Once the frontend is configured, you can use and see what the api-gateway is calling.
-
Api gateway
